AWS Bootstrap Installation
Deploy Konstruct on an AWS EKS cluster. Three steps: create an EKS cluster, connect a git provider (GitHub App or GitLab OAuth App), then run Terraform.
Prerequisites
- AWS account with credentials configured (
aws configure) - Terraform 1.5+
kubectlv1.30+eksctl(install guide)- A domain you control (registrar access to update NS records)
Step 0: Create an EKS Cluster
If you already have an EKS cluster, skip to Step 1.
eksctl create cluster \
  --name konstruct-mgmt \
  --region us-west-2 \
  --version 1.35 \
  --with-oidc \
  --nodegroup-name konstruct-nodes \
  --node-type m5.xlarge \
  --nodes 3 \
  --nodes-min 3 \
  --nodes-max 5 \
  --managed
This takes ~15-20 minutes.
Cluster requirements:
- Minimum 3x
m5.xlargenodes (the platform deploys ~10 services: ESO, cert-manager, ingress-nginx, external-dns, Dex, and the Konstruct platform with 6 operators) - OIDC provider enabled (required for IRSA — see below)
- No special VPC, subnet, or EBS CSI driver requirements
Once the cluster is ready, verify nodes:
kubectl get nodes
# Expect 3 nodes in Ready state
Enable the OIDC provider (required for IRSA, not enabled by default):
eksctl utils associate-iam-oidc-provider \
  --cluster konstruct-mgmt --region us-west-2 --approve
Then record the OIDC endpoint for Terraform:
aws eks describe-cluster --name konstruct-mgmt --region us-west-2 \
  --query 'cluster.identity.oidc.issuer' --output text
Step 1: Create a GitHub App (GitHub Only)
- Go to GitHub > Settings > Developer settings > GitHub Apps > New GitHub App
- Configure:
- Name:
konstruct-<your-domain>(must be unique across GitHub) - Homepage URL:
https://konstruct.<your-domain> - Callback URL:
https://konstruct.<your-domain>/api/v1/github-app/callback - Setup URL:
https://konstruct.<your-domain>/api/v1/github-app/callback - Check "Request user authorization (OAuth) during installation"
- Check "Redirect on update"
- Webhook: Uncheck "Active" (not needed for bootstrap)
- Permissions:
- Repository: Administration (Read & write), Contents (Read & write), Metadata (Read-only)
- Organization: Members (Read-only)
- Where can this GitHub App be installed? Only on this account
- Name:
- After creation, note:
- App ID
- Client ID
- Client Secret (generate one)
- Generate a private key (downloads a
.pemfile)
Do not install the GitHub App on your organization yet. That happens during onboarding in the Konstruct UI.
If you are using GitLab instead of GitHub, skip this step and follow Step 1b below. You only need one git provider.
Step 1b: Create a GitLab OAuth App (GitLab Only)
Konstruct 0.6 supports GitLab as a git provider using OAuth. You can configure this at the GitLab instance level (Admin area) or at the group level.
Create the OAuth application
- In your GitLab instance, go to one of:
- Instance-level: Admin Area > Applications > New application
- Group-level: Your group > Settings > Applications > Add new application
- Configure:
-
Name:
konstruct-<your-domain>(e.g.,konstruct-example-com) -
Redirect URI:
https://konstruct.<your-domain>/api/v1/auth/callback -
Scopes: check
api,read_repository,write_repository -
Leave Confidential checked
-
- Click Save application
- Note the Application ID and Secret — you will need both for
terraform.tfvars
The redirect URI must exactly match https://konstruct.<your-domain>/api/v1/auth/callback. A trailing slash or wrong path will cause OAuth to fail silently.
What the scopes grant
| Scope | Purpose |
|---|---|
api | Create and manage repositories, webhooks, and group members |
read_repository | Clone and read GitOps repository contents |
write_repository | Push GitOps manifests during cluster provisioning |
Step 2: Run Terraform
Terraform handles AWS infrastructure, platform services, and the Konstruct installation.
git clone https://github.com/konstructio/konstruct-aws.git
cd konstruct-aws/konstruct-bootstrap-job-role
Generate a bcrypt password hash
The dex_config.admin_password field requires a bcrypt hash of your desired login password:
htpasswd -nbBC 10 "" 'your-password' | tr -d ':\n' | sed 's/$2y/$2a/'
For example, using the password konstruct:
htpasswd -nbBC 10 "" 'konstruct' | tr -d ':\n' | sed 's/$2y/$2a/'
# Output: $2a$10$... (your hash will differ due to random salt)
Copy the output (starts with $2a$10$...) — you'll use it in the tfvars below. Remember the plain text password — you'll need it to login to Konstruct as the kbot user.
Use a simple alphanumeric password. Special characters like ! can break shell quoting.
Generate a shared OIDC secret
The oidc_client_secret in konstruct_api_config must match the secret in dex_config.static_clients[0]. Generate one:
openssl rand -hex 32
Configure terraform.tfvars
cluster_oidc_endpoint = "https://oidc.eks.us-west-2.amazonaws.com/id/YOUR_OIDC_ID"
cluster_name          = "konstruct-mgmt"
region                = "us-west-2"
domain                = "your-domain.com"
alerts_email          = "alerts@your-domain.com"
git_provider          = "github"  # "github" or "gitlab"

# DNS: "aws" for Route53 (default), "cloudflare" for Cloudflare
dns_provider = "aws"
# cloudflare_api_token = "your-token"  # Required only if dns_provider = "cloudflare"

# Path to the .pem file downloaded in Step 1
github_app_private_key_file = "path/to/your-app.private-key.pem"

konstruct_api_config = {
  admin_user               = "kbot"
  client_email             = "admin@your-domain.com"

  # GitHub App fields (Step 1) — leave empty if using GitLab
  github_app_client_id     = "Iv1.abc123"                # From Step 1
  github_app_client_secret = "your-client-secret"         # From Step 1
  github_app_id            = "123456"                      # From Step 1
  github_app_name          = "konstruct-your-domain-com"   # From Step 1

  # GitLab OAuth fields (Step 1b) — leave empty if using GitHub
  gitlab_client_id         = ""                            # Application ID from Step 1b
  gitlab_client_secret     = ""                            # Secret from Step 1b

  license_validator_url    = ""
  oidc_client_id           = "konstruct"
  oidc_client_secret       = "YOUR_SHARED_SECRET"          # From openssl command above
  webhook_url              = ""
}

dex_config = {
  admin_password = "$2a$10$..."  # bcrypt hash from htpasswd command above

  # Azure AD (optional — leave empty if not using Azure SSO)
  azure_client_id     = ""
  azure_client_secret = ""
  azure_tenant_id     = ""

  static_clients = [
    {
      id     = "konstruct"
      name   = "Konstruct"
      public = false
      redirectURIs = [
        "https://konstruct.your-domain.com/api/v1/auth/callback"
      ]
      secret = "YOUR_SHARED_SECRET"  # Must match oidc_client_secret above
    }
  ]
}
Apply
terraform init
terraform plan   # Review what will be created
terraform apply
Open a second terminal and watch pods come up: kubectl get pods -A -w
This creates:
- IRSA roles for all platform services (ESO, cert-manager, external-dns, konstruct operators)
- SSM parameters for secrets
- Route53 hosted zone (if
dns_provider = "aws") or Cloudflare ExternalSecret - S3 state store bucket
- EKS access entries for Argo CD
Namespaces:dex,konstruct-system- CRDs:
helmtemplates,pipelinetemplates - Helm releases: External Secrets Operator, Ingress NGINX, Cert Manager, External DNS, Dex, Konstruct (chart version
0.6.0) - ClusterSecretStore (
konstruct-aws-ssm), ClusterIssuer (letsencrypt-prod) - ExternalSecrets for Dex config and API secrets
Step 3: Configure DNS
After terraform apply completes, you must delegate your domain to the Route53 nameservers so that TLS certificates can be issued and services are reachable.
If using Route53 (dns_provider = "aws")
-
Get the nameservers from the Terraform output:
terraform output route53_nameservers -
Go to your domain registrar and update the NS records for your domain to the four nameservers shown (e.g.,
ns-1234.awsdns-56.org,ns-789.awsdns-01.co.uk, etc.) -
Verify DNS delegation is propagating:
dig NS your-domain.comYou should see the AWS nameservers in the response. Full propagation can take 15 minutes to 48 hours depending on your registrar.
-
Check that cert-manager can issue certificates:
kubectl get certificates -A
kubectl get challenges -A
Certificates will stay in a
Pendingstate until DNS propagation completes. This is expected. -
If certificates remain
Pendingafter DNS has propagated (confirmed viadig), the cluster's CoreDNS may have a stale cache. Restart it:kubectl rollout restart deployment coredns -n kube-systemThen watch certificates resolve:
kubectl get certificates -A -w
Confirming the full chain
Use this sequence to verify each layer is working:
# 1. Confirm NS delegation is live (should return awsdns nameservers)
dig NS your-domain.com +short

# 2. Confirm Route53 is answering directly
dig SOA your-domain.com @ns-YOUR-NAMESERVER.awsdns-XX.com +short

# 3. Confirm cert-manager challenges are progressing
kubectl get challenges -A

# 4. If challenges show SERVFAIL, restart CoreDNS (stale cache)
kubectl rollout restart deployment coredns -n kube-system

# 5. Confirm certificates are issued
kubectl get certificates -A
If using Cloudflare (dns_provider = "cloudflare")
Cloudflare manages DNS automatically via the API token you provided. No manual delegation is needed, but verify the zone is active in your Cloudflare dashboard.
TLS certificates and ingress URLs will not work until DNS is fully propagated. If you see certificate errors, run kubectl describe challenges -A to see the specific failure reason.
Step 4: Login and Onboard
Allow time for all services to become ready. Expect:
- NLB provisioning: 3-5 minutes after apply
- DNS propagation: 15 minutes to 48 hours
- TLS certificate issuance: a few minutes after DNS resolves
Check readiness:
# All platform pods running
kubectl get pods -n konstruct-system

# Ingress has an external address
kubectl get svc -n ingress-nginx

# TLS certificate is ready
kubectl get certificates -n konstruct-system
Once the certificate shows Ready = True:
- Open
https://konstruct.<your-domain> - Login with username kbot and the plaintext password you hashed in Step 2
Connect your Git provider
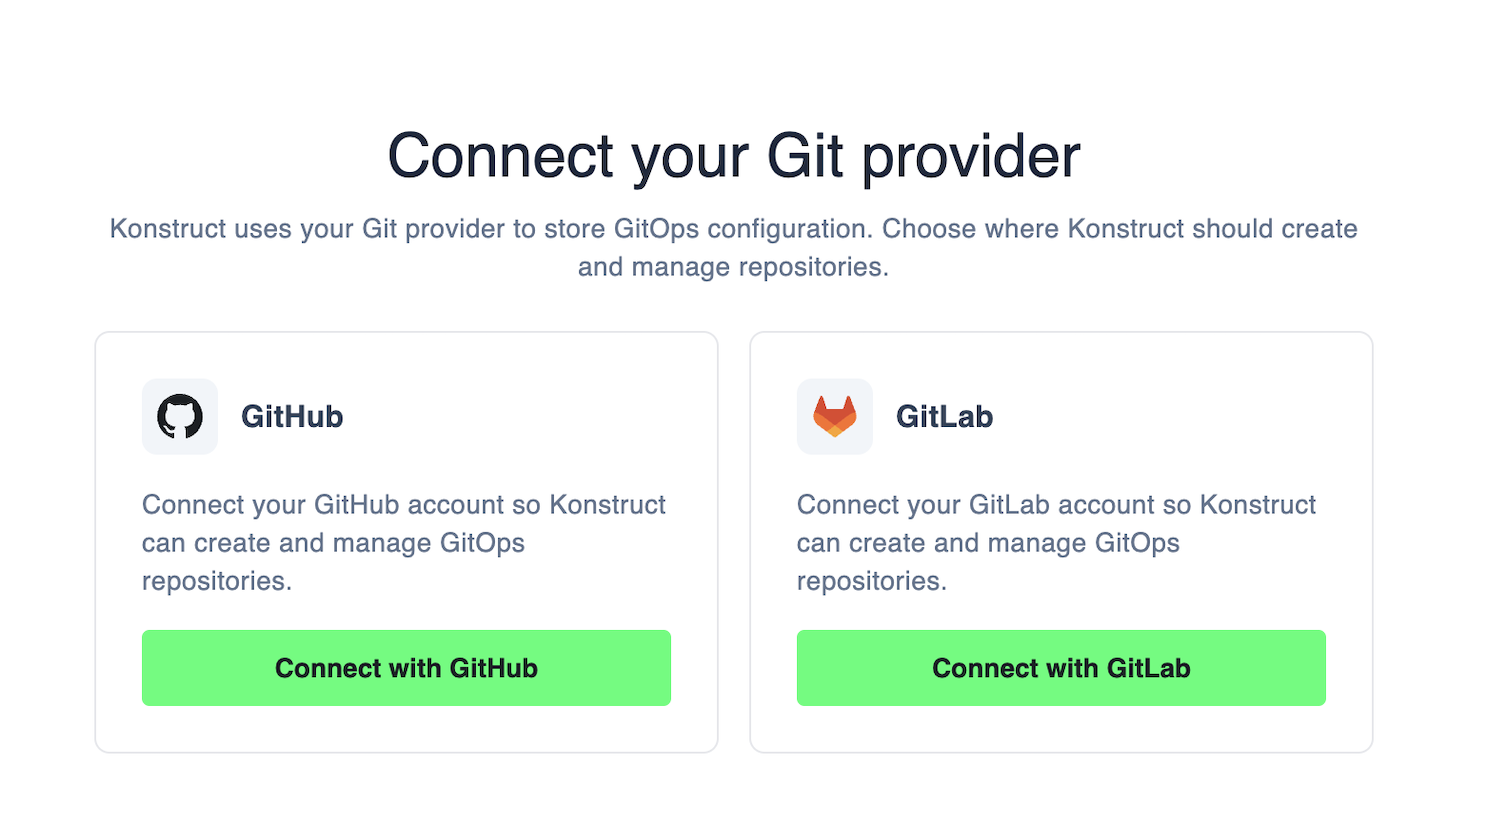
After login, Konstruct redirects you to the onboarding page: "Connect your Git provider".
GitHub
-
Click Connect with GitHub — a popup opens for GitHub OAuth
-
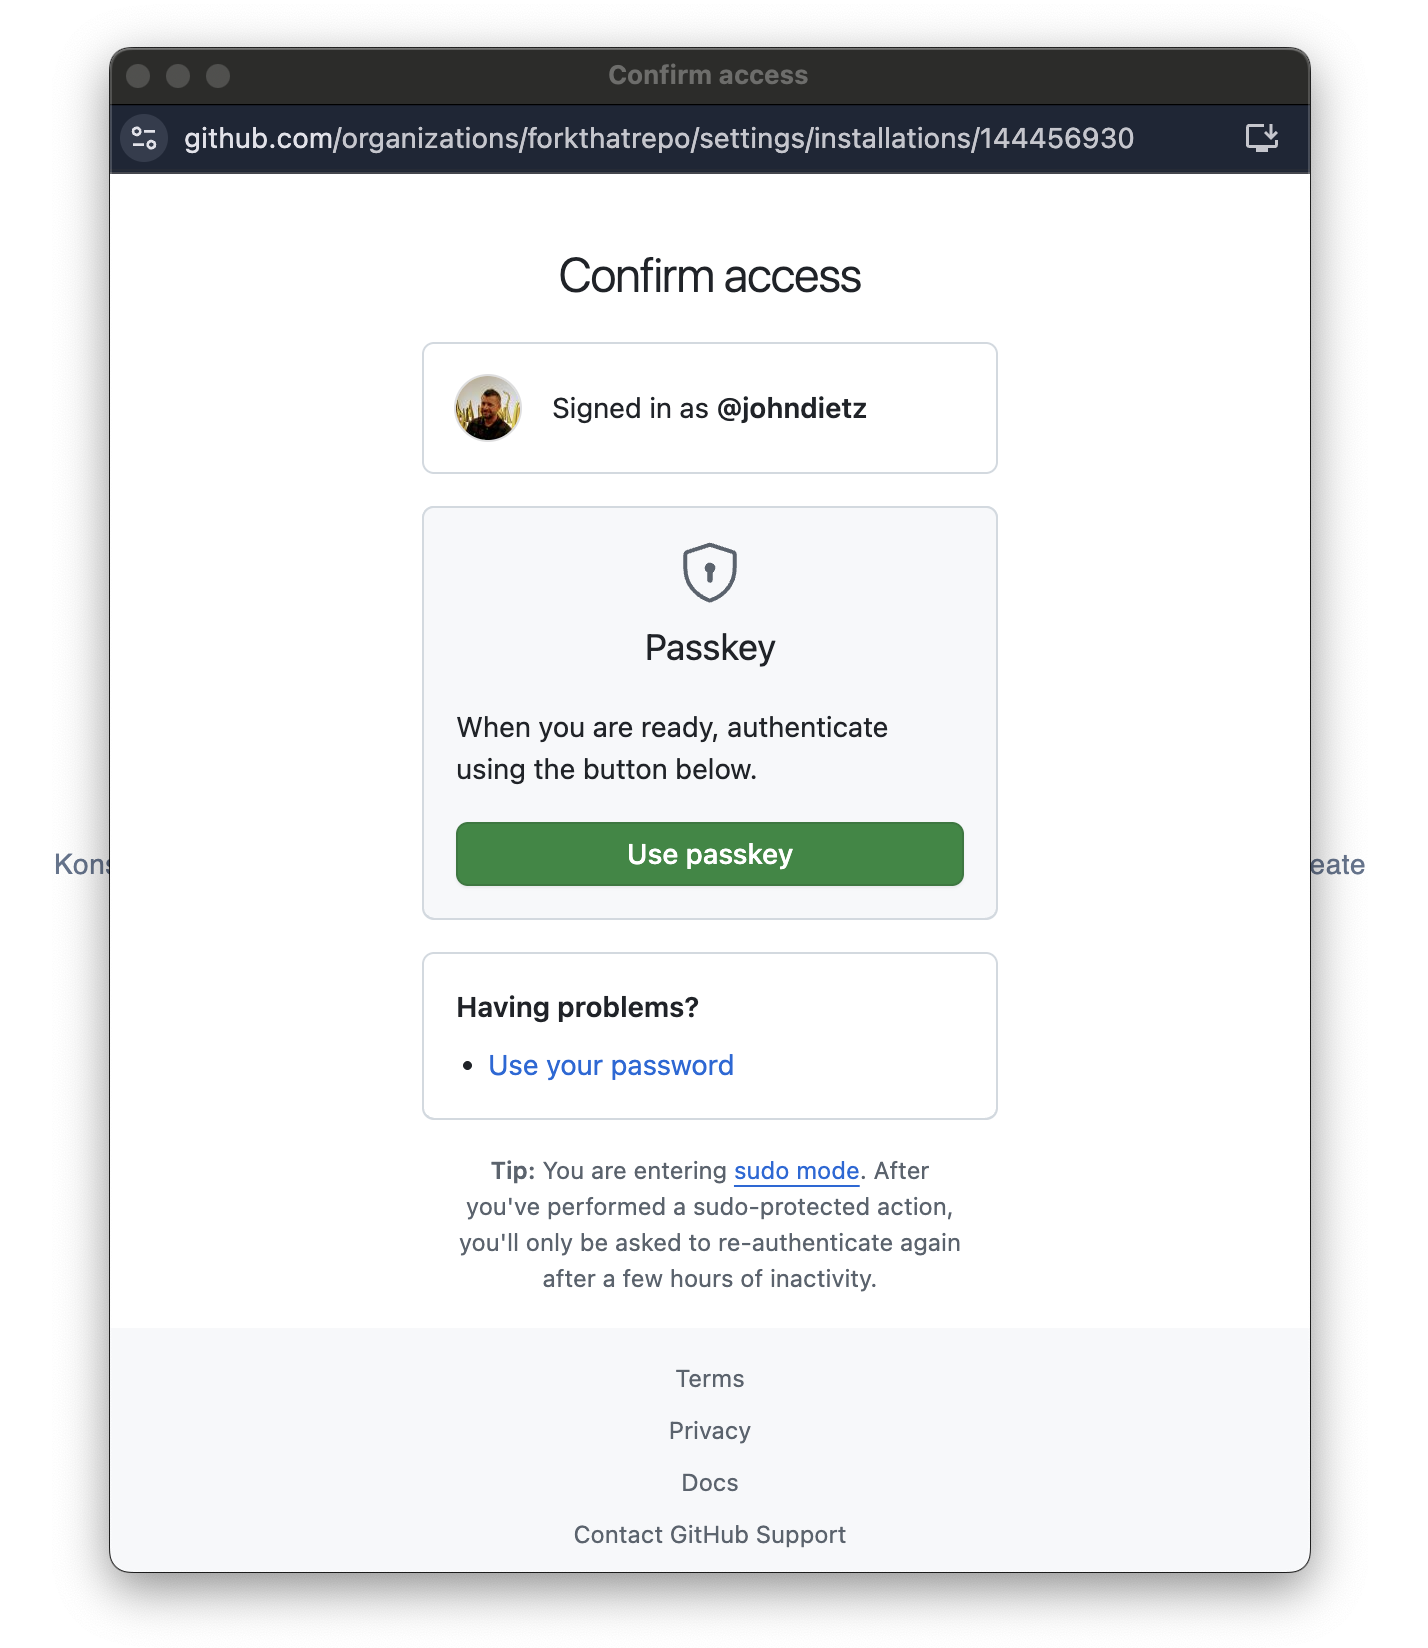
GitHub asks you to confirm access — authenticate with your password or passkey
-
After authorization, you'll see: "Connected as @username. Install the Konstruct GitHub App on the account you want to use."
-
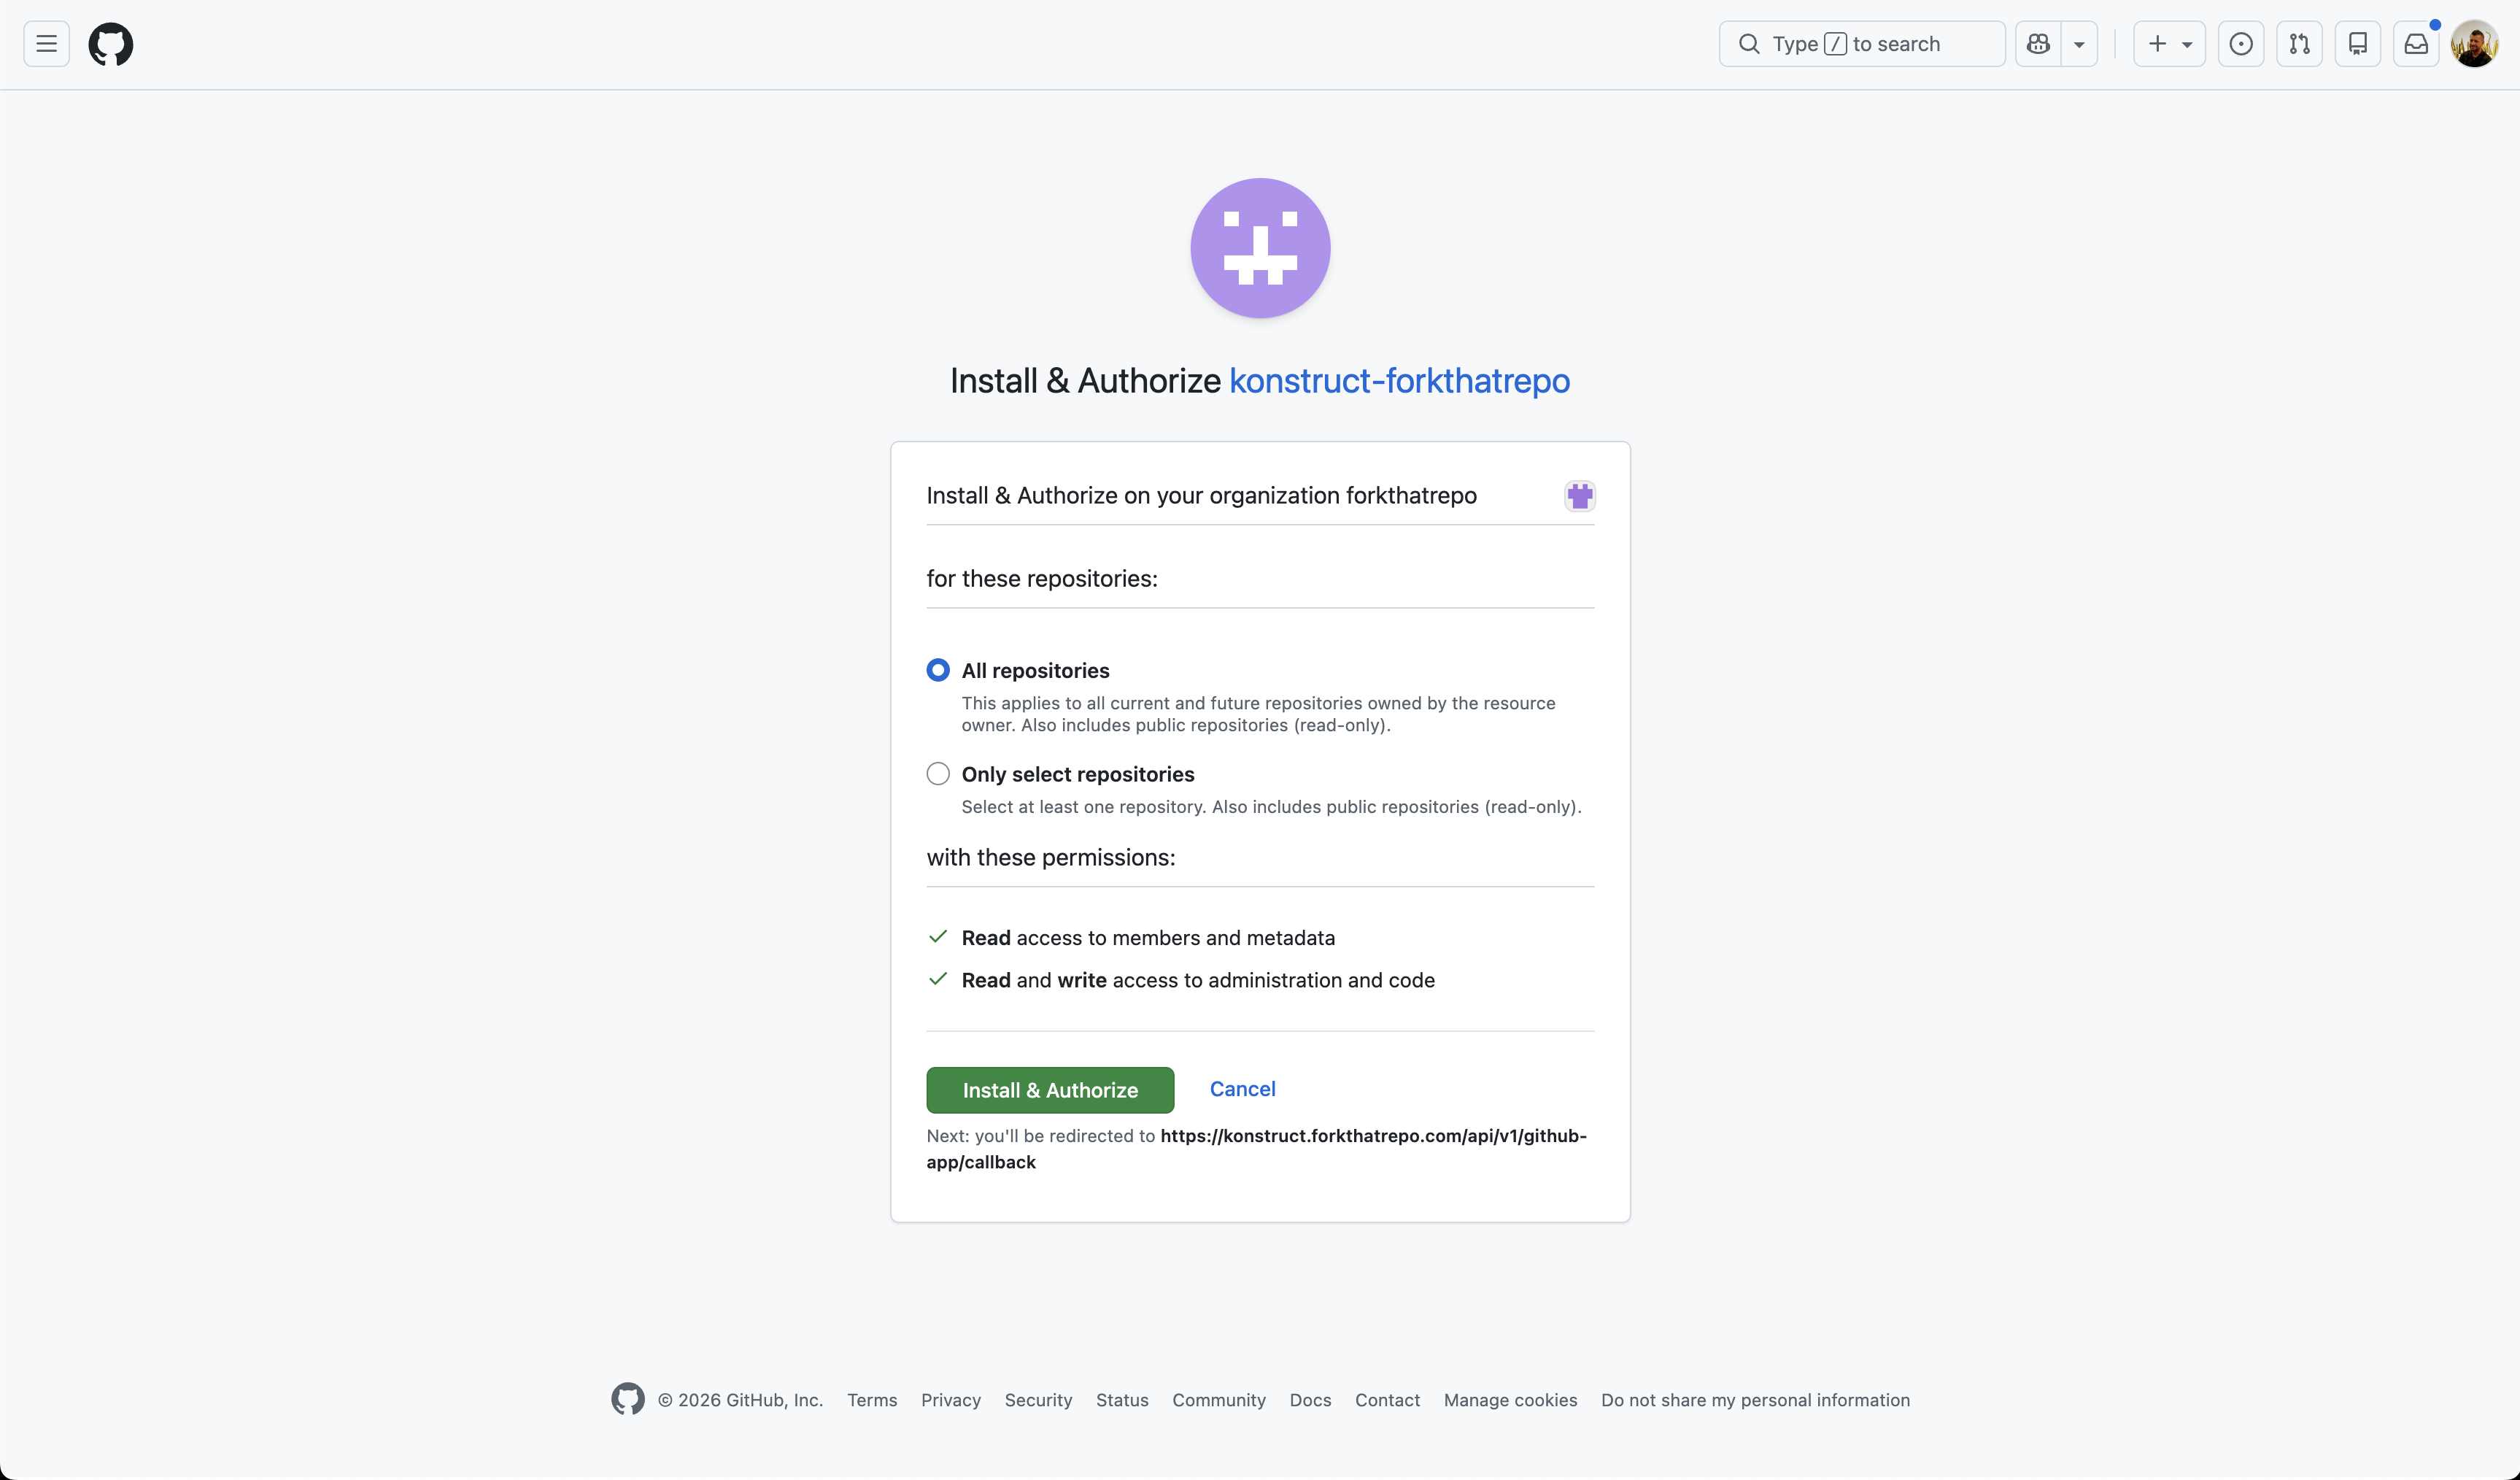
Click Install GitHub App — a second popup opens to
github.com/apps/<your-app>/installations/new -
Select the GitHub organization where Konstruct should create and manage repositories
-
Leave All repositories selected and click Install & Authorize
-
The popup closes and Konstruct saves the connection automatically
If the GitHub App is already installed on your organization (e.g. from a previous install), the popup opens the app's settings page instead of the install flow. This is expected — close the popup and Konstruct will detect the existing installation automatically.
GitLab
- Click Connect with GitLab — a popup opens for GitLab OAuth
- Authorize the application in the popup
- After authorization, you'll see a list of GitLab groups where you have Owner access
- Select the group where Konstruct should create and manage repositories
If no groups appear, verify that your GitLab user has Owner access to at least one group.
Welcome page
After connecting, Konstruct redirects you to the home page with a setup checklist:
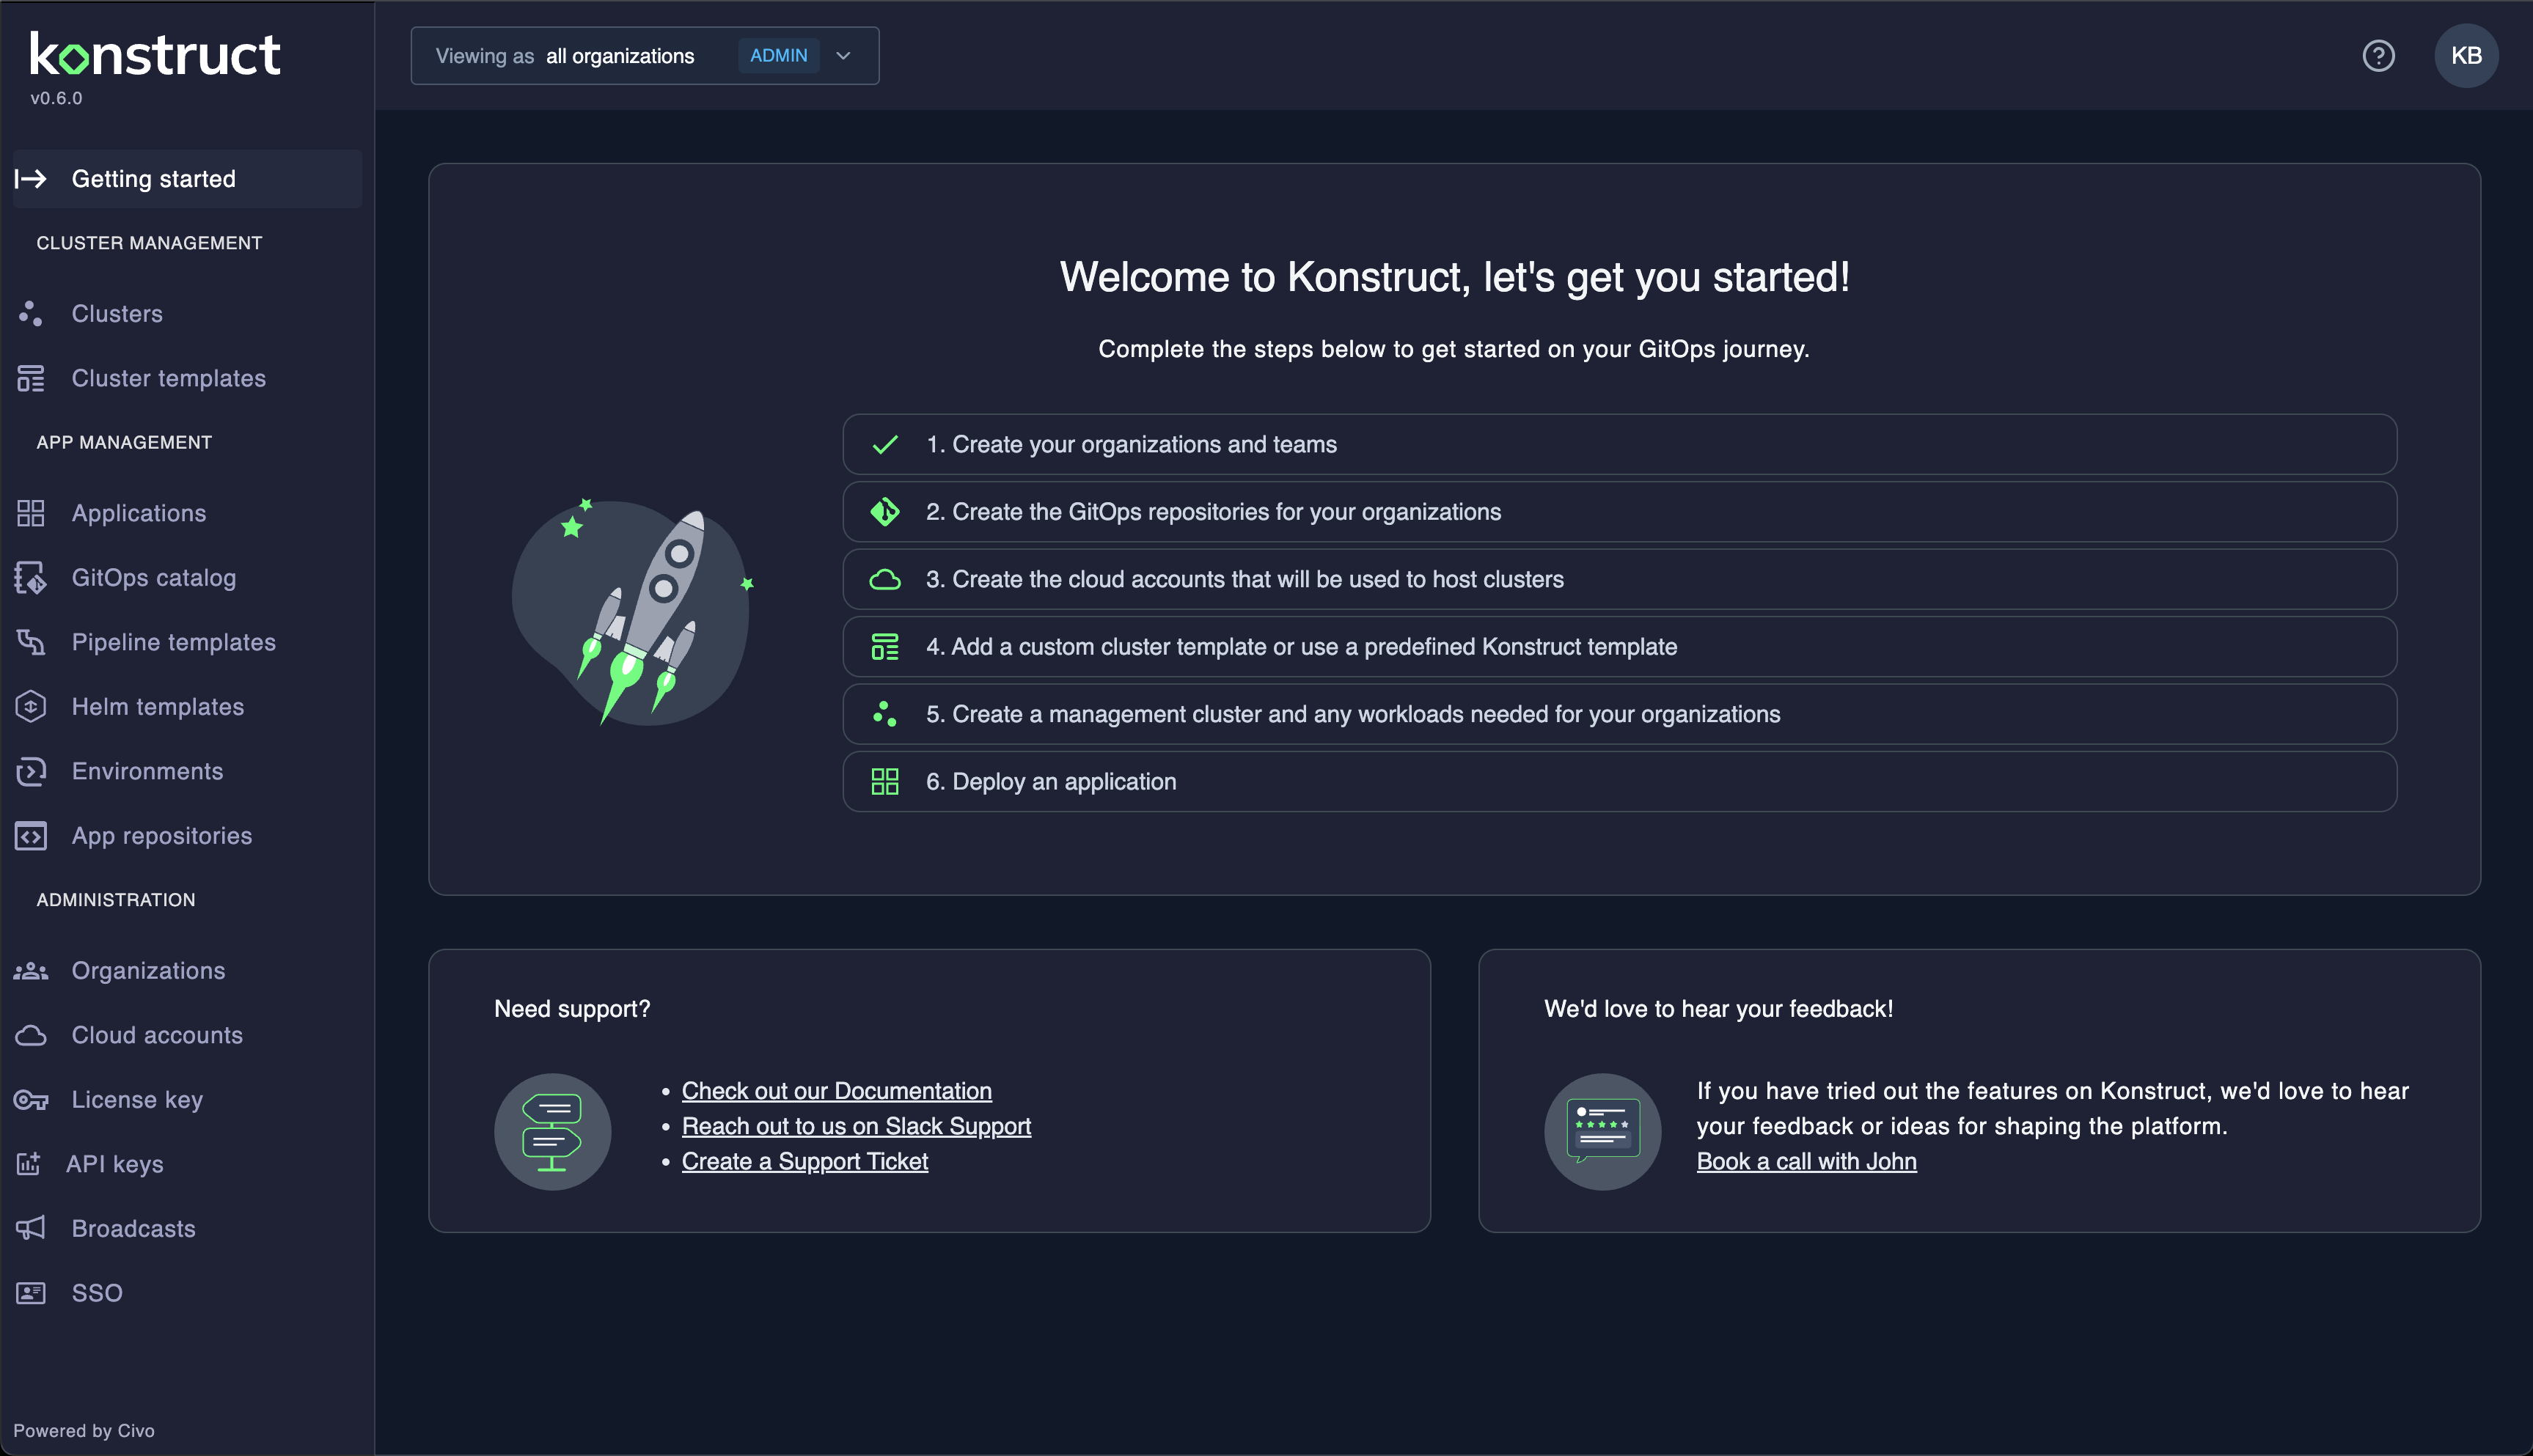
- Create your organizations and teams
- Create the GitOps repositories for your organizations
- Create the cloud accounts that will host clusters
- Add a cluster template or use a predefined Konstruct template
- Create a management cluster and any workloads
- Deploy an application
Each step links to the relevant page in Konstruct. Items show a checkmark as you complete them.
What happens behind the scenes
When you connect a Git provider, Konstruct automatically:
- Stores the GitHub App / GitLab OAuth connection
- Creates a bootstrap Project custom resource
- The team-management-operator hydrates a GitOps repository with platform templates
- Argo CD is installed and takes over management of all platform components
Verify
# All pods running
kubectl get pods -n konstruct-system

# After onboarding completes, ArgoCD manages everything
kubectl get pods -n argocd
kubectl get applications -n argocd

# Check the gitops repo was created in your GitHub org
Troubleshooting
Pods stuck in CrashLoopBackOff
Check logs for the failing pod:
kubectl logs -n konstruct-system <pod-name> --previous
Common causes: missing SSM parameters (check kubectl get externalsecrets -A), IRSA role misconfiguration.
Certificates stuck in Pending
kubectl describe challenges -A
SERVFAIL errors: If challenges show rcode was expected to be 'NOERROR' or 'NXDOMAIN', but got 'SERVFAIL', but dig NS your-domain.com returns the correct AWS nameservers, the cluster's CoreDNS has a stale cache:
kubectl rollout restart deployment coredns -n kube-system
No SERVFAIL: DNS delegation hasn't propagated yet. Verify with dig NS your-domain.com +short and wait.